 Save to Pinterest
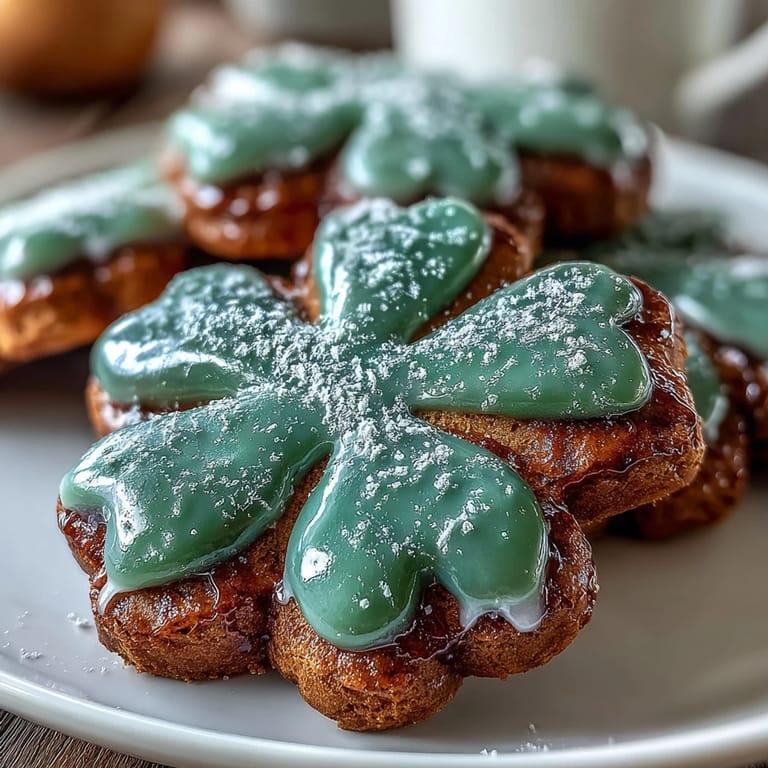
 My neighbor knocked on the door that March morning with flour still dusting her apron, asking if I'd help her test a shamrock cookie recipe for her daughter's school party. We'd never baked together before, but something about the way she described the bright green icing made me want to try. Three hours later, our kitchen smelled like vanilla and butter, and we were both laughing at our first batch of lopsided shamrocks. That's when I realized these cookies weren't just about St. Patrick's Day—they were about that particular kind of joy that comes from making something colorful with someone who matters.
I made these for the first time on a rainy afternoon when my son asked why we couldn't celebrate St. Patrick's Day at home instead of at school. By evening, we had two dozen cookies cooling on the rack, and he was carefully piping green icing onto each one like he was decorating tiny edible masterpieces. He insisted on tasting one before it was fully set, got icing all over his face, and didn't care one bit. That's the moment I understood why this recipe works—it's as much fun to make as it is to eat.
Ingredients
- All-purpose flour: The foundation that keeps these cookies tender rather than tough; don't skip the sifting step if your flour has been sitting in a humid kitchen.
- Unsalted butter: Let it soften at room temperature for at least an hour so it creams properly with the sugar and traps air for a light texture.
- Granulated sugar: This is what creates that delicate snap when you bite into the edge of the cookie before it softens in the middle.
- Egg: Brings moisture and richness; use a large one or your dough might turn out too dry.
- Vanilla and almond extracts: The almond extract is optional but worth trying once—it adds a whisper of sophistication that people can't quite identify but love.
- Baking powder: Just enough to give the cookies gentle lift without making them cakey or hollow.
- Powdered sugar and meringue powder: The meringue powder is the secret to icing that sets firm and shiny; don't substitute it with egg white unless you understand food safety.
- Green gel food coloring: Gel holds its color better than liquid food coloring and won't thin out your icing like drops would.
Tired of Takeout? 🥡
Get 10 meals you can make faster than delivery arrives. Seriously.
One email. No spam. Unsubscribe anytime.
Instructions
- Mix your dry ingredients first:
- Whisk flour, baking powder, and salt together in a bowl and set it aside. This prevents lumps from hiding in your dough and ensures the leavening distributes evenly.
- Cream butter and sugar until fluffy:
- This takes about two minutes with a mixer and is the moment when everything becomes pale and almost mousse-like. Don't rush this step; you're creating tiny air pockets that make the cookies tender.
- Add your wet ingredients:
- Beat in the egg, vanilla, and almond extract one at a time until each one disappears into the butter mixture. If you rush and add everything at once, the dough can look broken.
- Bring wet and dry together gently:
- Add the flour mixture in two additions, stirring just until the dough comes together. Overmixing creates tough cookies, so stop as soon as you don't see dry streaks.
- Chill your dough:
- Divide the dough into two discs, wrap them tightly in plastic wrap, and refrigerate for at least an hour. Cold dough is easier to roll and cut without spreading, and it bakes up more uniform.
- Roll and cut with confidence:
- On a lightly floured surface, roll dough to 1/4-inch thickness and cut shamrock shapes about an inch apart. If the dough gets soft, pop it back in the fridge for ten minutes.
- Bake until just golden:
- Watch for the edges to turn a pale golden color at 350°F for 8 to 10 minutes. The centers will still look slightly underdone, and that's exactly right—they'll firm up as they cool.
- Cool properly before decorating:
- Let cookies rest on the pan for five minutes, then transfer to a wire rack to cool completely. Warm cookies will soften the icing before it has a chance to set.
- Make your royal icing smooth:
- Beat powdered sugar and meringue powder with water and vanilla for about five to seven minutes until it's glossy and smooth enough to pipe. This takes longer than you'd think, but patience pays off.
- Color your icing the right shade:
- Add green gel food coloring drop by drop, mixing thoroughly after each addition. A little goes a long way, and you can always add more but can't take it back.
- Pipe and flood with intention:
- Use a piping bag with a small round tip to outline each shamrock shape, then flood the inside with icing. Let the outline set for a minute or two before flooding so it holds the shape.
- Wait for the icing to harden:
- Let cookies sit undisturbed for at least an hour before touching or stacking them. Patience here prevents smudges and broken designs.
 Save to Pinterest
 My mother called while I was decorating and asked about my day, and I found myself describing in detail how each shamrock was turning out differently—some with perfect icing lines, some a little wonky—and how that felt right somehow. She laughed and said her cookies never looked like the pictures either, and that was always the best part because it meant they tasted like home instead of a bakery. That conversation changed how I think about decorating these things.
Storing Your Shamrock Cookies
These cookies keep beautifully in an airtight container at room temperature for up to a week, though they'll likely disappear much faster than that. The icing hardens completely, so they won't stick together or transfer color onto each other like softer iced cookies might. Stack them in a single layer between parchment paper if you need to store them in a tall container to prevent chipping.
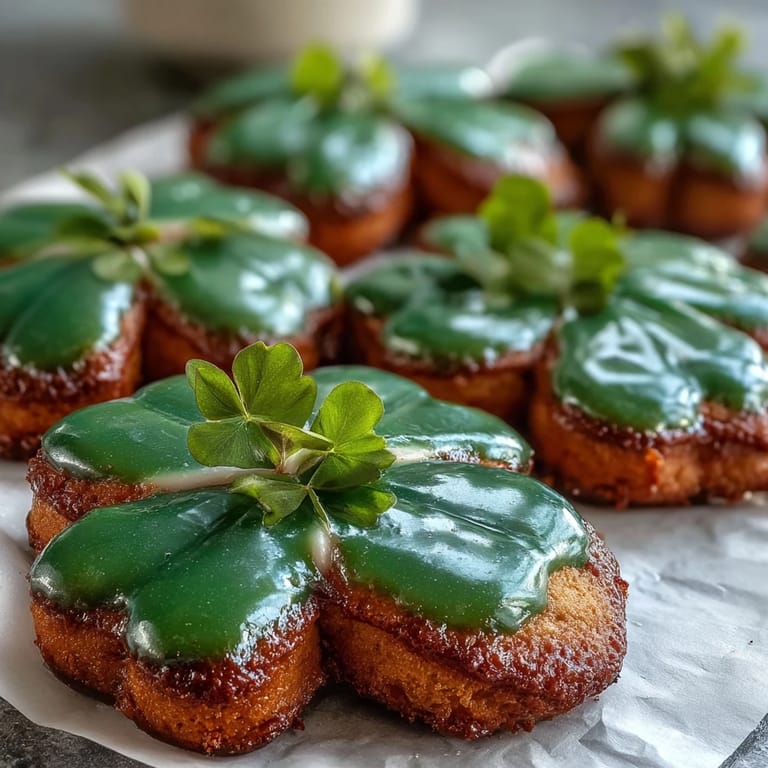
Making Them Even More Festive
If you want to take these past simple green icing, there are small touches that feel special without adding real complexity. Edible gold glitter sprinkled onto wet icing catches the light beautifully, or you can add tiny pearl sprinkles for a subtle shimmer. Some people pipe white icing details on top of the green, or add a thin outline in gold luster dust after everything has set for that extra shimmer.
Troubleshooting and Adjustments
If your cookies come out crispier than you wanted, reduce the baking time by a minute next time and they'll stay chewier. If your dough is too sticky to work with, flour your work surface a little more generously or chill it again for fifteen minutes. If your icing sets too quickly while you're working, add water one teaspoon at a time until it flows the way you need it to.
- For softer cookies throughout, pull them from the oven when the edges are barely colored and the centers still look slightly pale.
- If you don't have a shamrock cutter, use a three-leafed clover shape or even a simple round cookie cut to symbolize the holiday.
- Meringue powder is worth seeking out because it makes icing that hardens glossy and smooth rather than dull or crumbly.
 Save to Pinterest
 These cookies turn ordinary afternoons into celebrations, especially when you're making them with someone who means something to you. The green icing, the shamrock shapes, and the buttery sweetness become memories worth holding onto long after St. Patrick's Day has passed.
Recipe FAQs
- → What gives the icing its vibrant green color?
Green gel food coloring is used to create the rich green hue in the royal icing.
- → Can almond extract be omitted?
Yes, almond extract is optional and can be left out for a milder vanilla flavor.
- → How thick should the dough be rolled?
Roll the dough to about 1/4 inch (6 mm) thickness for optimal baking and texture.
- → What is the best way to store these cookies?
Store cookies in an airtight container at room temperature to keep them fresh for up to one week.
- → Can the baking time be adjusted for softer cookies?
Reducing baking time by one minute helps achieve a softer cookie texture.