 Save to Pinterest
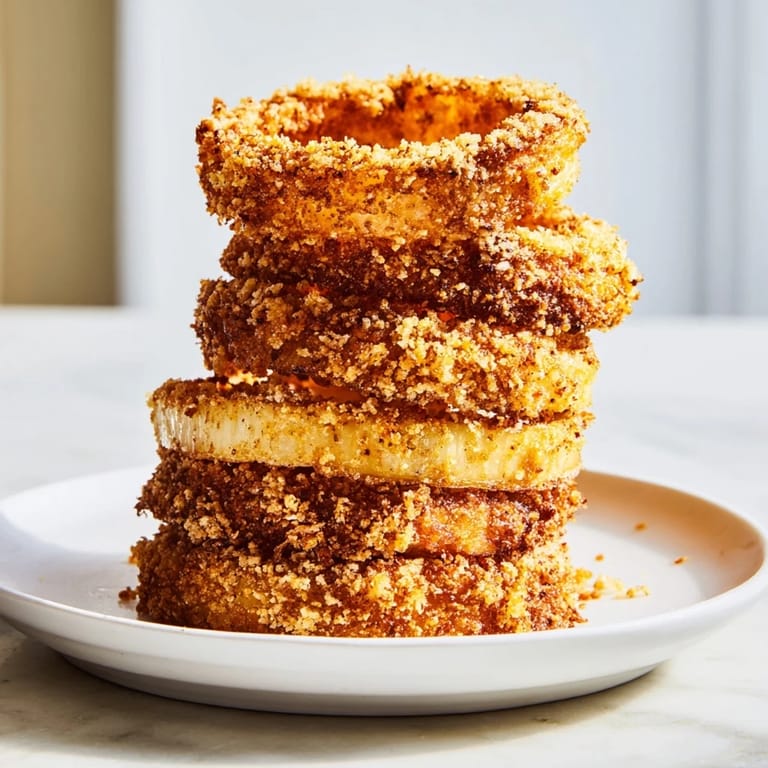
 The first time I stacked onion rings into a tower at a dinner party, I was genuinely nervous—would they topple like a delicious game of Jenga? They didn't. Instead, guests gathered around the platter mesmerized, and I realized that crispy golden towers of fried onion have an almost irresistible appeal. That night taught me that sometimes the simplest ingredients, when handled with care and a little kitchen creativity, become the star of the show.
I remember my partner asking why onion rings were taking up half my Saturday afternoon. By the time the second batch came out of the oil, golden and impossibly crunchy, they understood completely—it's the kind of thing that demands your full attention but rewards you with pure joy.
Ingredients
- Large yellow onions (2): Sweet varieties slice into thick, sturdy rings that hold their shape through battering and frying; avoid red onions, which are thinner and more delicate.
- All-purpose flour (1 cup): The foundation of your batter, providing structure and helping the coating adhere.
- Cornstarch (½ cup): This is your secret weapon for crispness—it creates those shatteringly crispy edges that make people pause mid-chew.
- Baking powder (1 teaspoon): Adds lift to the batter, creating tiny air pockets that make each ring feather-light inside.
- Smoked paprika, garlic powder (1 teaspoon each): These seasonings live in the batter itself, so every bite tastes intentional and layered, not just salty.
- Salt and black pepper (1 teaspoon and ½ teaspoon): Distributed through the batter for even seasoning rather than sprinkled on after, which is the difference between good and unforgettable.
- Cold sparkling water (1 cup): The carbonation keeps the batter light; cold temperature helps it coat without getting gummy.
- Eggs (2 large): They bind everything together and help the batter stick to the onion rings with gentle confidence.
- Panko breadcrumbs (2 cups): Coarser than regular breadcrumbs, panko creates that distinctive golden, crunchy texture; don't skip this step.
- Vegetable oil: Neutral oil with a high smoke point is essential for frying without imparting unwanted flavors or burning.
Tired of Takeout? 🥡
Get 10 meals you can make faster than delivery arrives. Seriously.
One email. No spam. Unsubscribe anytime.
Instructions
- Slice and Separate Your Onions:
- Cut onions into ¾-inch rings—thick enough to hold their structure, thin enough to cook through. Separate each ring gently; loose layers are fine and actually fry beautifully.
- Build Your Dry Base:
- Whisk flour, cornstarch, baking powder, smoked paprika, garlic powder, salt, and pepper in a large bowl. This step distributes seasonings evenly so you don't have bland or over-seasoned pockets.
- Combine Wet Ingredients:
- Beat eggs and cold sparkling water together until slightly frothy. The carbonation will make a subtle but noticeable difference in how light the final coating feels.
- Make Your Batter:
- Pour wet ingredients into dry ingredients and whisk until smooth—a few small lumps are fine, but don't overmix. The batter should coat the back of a spoon; add more water if it's too thick.
- Prepare Your Coating Station:
- Pour panko into a shallow dish. Having everything prepped before you start battering keeps the process smooth and prevents rings from sitting around getting soggy.
- Coat Each Ring:
- Dip each onion ring into batter, let excess drip off for a second, then roll in panko until fully covered. A double-dip creates extra crispness if you're feeling ambitious.
- Deep-Fry Method:
- Heat oil to 350°F in a deep pot or fryer—a thermometer here is non-negotiable. Fry rings in single-layer batches for 2–3 minutes, turning occasionally with tongs, until golden and crispy. The oil should bubble gently, never aggressively.
- Air-Fryer Method:
- Preheat to 400°F, arrange coated rings in a single layer, lightly spray with oil, and air-fry for 8–10 minutes, shaking the basket halfway through. You'll get crispness without the oil splash.
- Drain and Keep Warm:
- Transfer fried rings to a wire rack (not paper towels, which trap steam) to cool and stay crispy. If batching, keep finished rings warm on a rack in a 200°F oven.
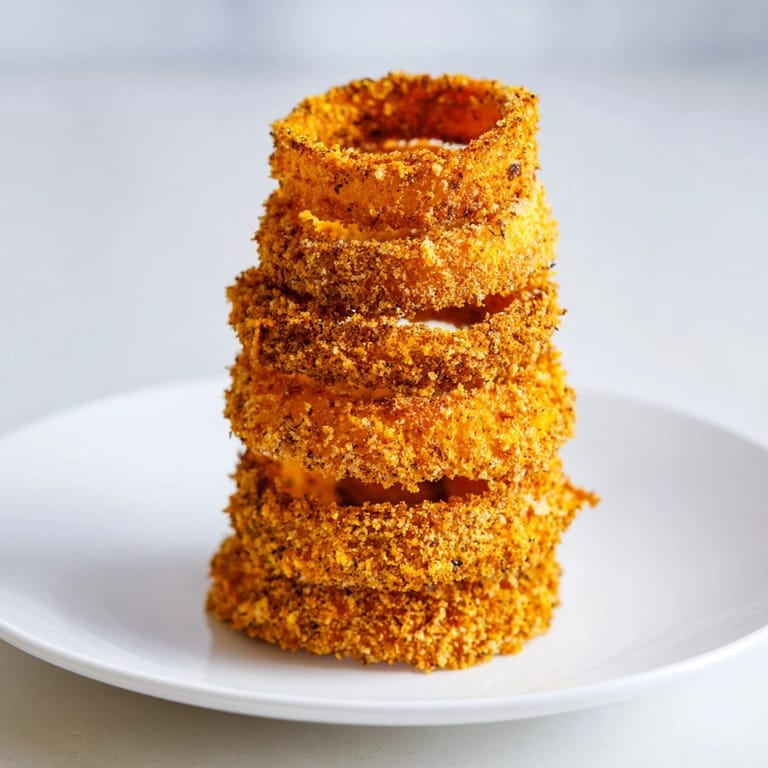
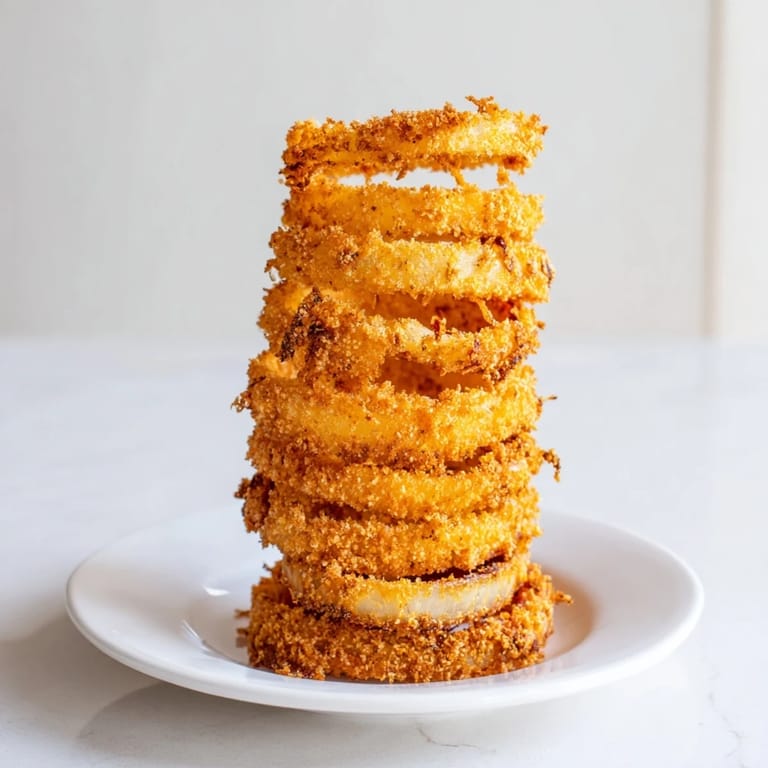
- Stack and Serve:
- Arrange cooled rings into a tower on a serving platter, largest rings at the base, leaning them slightly against each other. Serve immediately with dipping sauces of choice.
 Save to Pinterest
 There was an evening when someone took a bite of these, closed their eyes for a second, and said nothing—just smiled. That silence said more than any compliment ever could. Somehow, fried onion rings had become the vehicle for a moment that mattered.
The Art of the Perfect Crunch
Crispness in fried food is about a few simple things working together: dry breadcrumb coating, proper oil temperature, and timing. I learned this through mistakes—soggy rings that trapped steam, rings that browned too fast and stayed raw inside, rings that lost their crackle five minutes after frying. Once I understood that every step either protects or compromises the crunch, everything clicked into place. The panko wants to be coarse; the oil wants to be exactly right; and the rings want to cool on something that lets air circulate underneath them.
Serving and Pairing Ideas
These rings work as a fancy appetizer at a dinner party, a fun side at a casual gathering, or honestly just a weekend craving that justifies the oil splatters. I've served them with spicy mayo (sriracha mixed into mayo), classic ranch, and even a lemony aioli that caught people off guard in the best way. The tower presentation makes them feel intentional and special, even though they're technically simple. Cold sparkling water works in the batter, but so does beer or even strong broth if you're experimenting—each brings subtle differences to how the batter crisps.
Storage and Make-Ahead Tips
Crispy fried foods are best the moment they're done, but life isn't always about perfect timing. You can bread the onion rings an hour or two ahead and keep them in the fridge on a parchment-lined plate, covered loosely so they don't stick together. Fry them fresh just before serving. If you've already fried them and want to revive them, a few minutes in a 350°F oven brings back most of the crunch—not quite as good as fresh, but honest and still delicious. Leftover rings are great cold with ketchup the next day, though I've never actually had leftovers stick around long enough to test this theory.
- Make the batter up to 2 hours ahead; store in the fridge to keep it cold.
- Bread the rings and refrigerate on parchment for up to 3 hours before frying.
- Fried rings stay crispy for about 20 minutes if they cool on a wire rack in a warm oven.
 Save to Pinterest
 Onion rings stacked into a tower are more than appetizer theater—they're an invitation to slow down and enjoy something made with care. Serve them hot, share them freely, and watch people remember why simple fried food tastes like celebration.
Recipe FAQs
- → What type of onions work best?
Large yellow onions provide sturdy, flavorful rings that hold up well during frying.
- → How can I make the batter extra crispy?
Combining flour with cornstarch and using cold sparkling water creates a light, crisp batter texture.
- → Can I use an air fryer instead of deep-frying?
Yes, air-frying at 400°F for 8-10 minutes yields golden, crispy results with less oil.
- → What are good dipping sauces to serve with this dish?
Spicy mayo, ranch dressing, or classic ketchup complement the crunchy onion rings well.
- → How do I keep onion rings crispy after cooking?
Place cooked rings on a wire rack in a warm oven (around 200°F) to keep them crisp until serving.