 Save to Pinterest
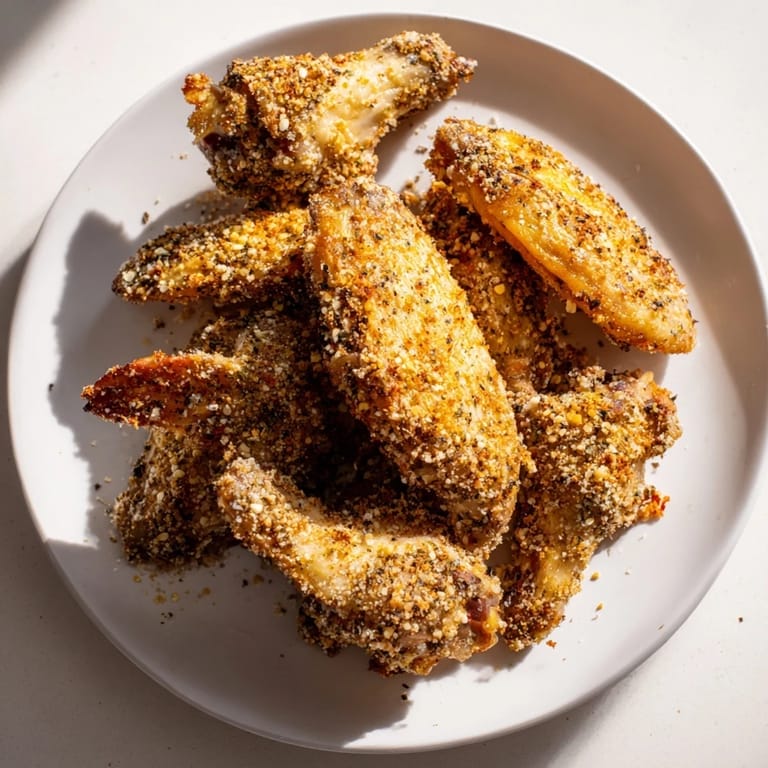
 My neighbor brought these to a Super Bowl party, and I watched them disappear faster than the halftime show. The golden crust caught my eye first, but the flavor—that savory Parmesan hitting your teeth with just enough herb undertone—made me ask for the recipe before dessert was even served. I've been making them ever since, usually when I need something that looks fancy but doesn't require stress.
I made a double batch for my daughter's graduation party, and my brother actually came back to the kitchen mid-conversation just to grab more. He stood there eating them straight from the pan while I was plating other appetizers, and I didn't even mind because watching someone enjoy food that much is its own reward.
Ingredients
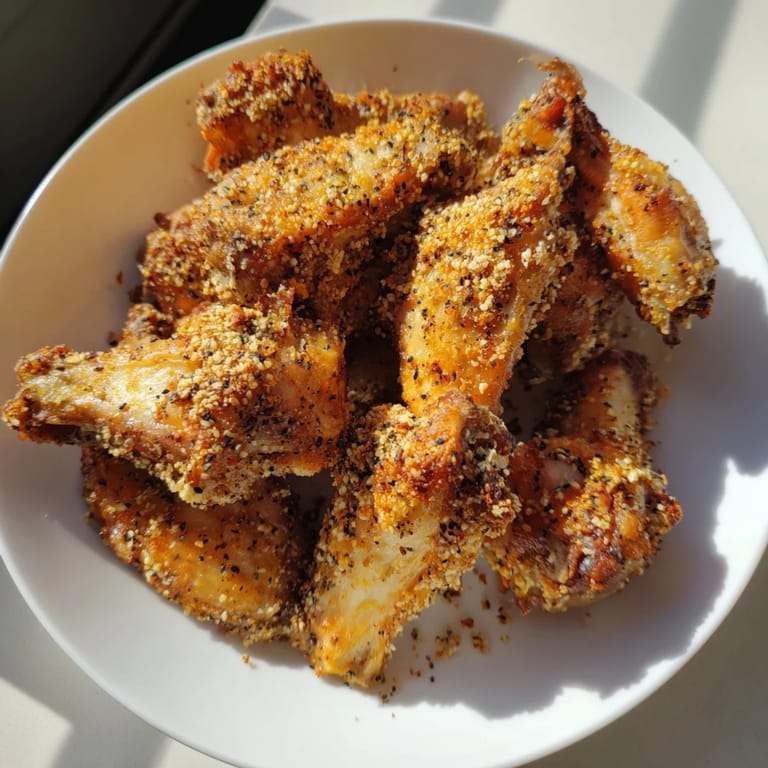
- Chicken wings, flats and drumettes: 1.2 kg (2.5 lbs). The separation matters because they cook evenly, and honestly, eating flats at a party is more elegant than gnawing on drumettes.
- Grated Parmesan cheese: 80 g (3/4 cup). Fresh grated tastes sharper than pre-shredded; I learned this the hard way.
- Fine breadcrumbs: 60 g (1 cup). Panko works too if you want extra texture, though fine crumbs give you that restaurant-style coating.
- Garlic powder: 2 tsp. Powdered versions distribute more evenly than trying to mince fresh garlic into the coating.
- Onion powder: 1 tsp. Adds sweetness without moisture, which keeps the crust crisp.
- Dried Italian herbs: 1 tsp. Or swap for oregano, thyme, or whatever suits your mood.
- Smoked paprika: 1/2 tsp. The smoke matters—it's subtle but changes the whole vibe.
- Freshly ground black pepper and sea salt: 1/2 tsp each. Both together, not a substitute.
- Eggs and milk: 2 large eggs and 2 tbsp milk. The egg is your glue; the milk thins it just enough to coat evenly.
- Olive oil: 2 tbsp. For brushing the pan and the wings—trust this step.
Tired of Takeout? 🥡
Get 10 meals you can make faster than delivery arrives. Seriously.
One email. No spam. Unsubscribe anytime.
Instructions
- Heat the oven and prep your pan:
- Set your oven to 220°C (425°F) and line a baking sheet with parchment paper, brushing it lightly with olive oil. This small step prevents sticking and makes cleanup feel like victory.
- Mix your wet base:
- Whisk eggs and milk together in a shallow bowl until they look uniform. Don't overthink it—this is just your adhesive.
- Combine your dry coating:
- In another bowl, mix Parmesan, breadcrumbs, garlic powder, onion powder, Italian herbs, paprika, pepper, and salt. Stir until there are no clumps, and the color is evenly speckled.
- Prepare the wings:
- Pat chicken wings completely dry with paper towels—moisture is the enemy of crispiness. This is where patience pays off.
- Coat each wing:
- Dip each wing into the egg mixture, shaking off excess, then roll it in the breadcrumb mixture, pressing gently so it sticks. This feels meditative once you find your rhythm.
- Arrange and brush:
- Lay wings in a single layer on the prepared sheet without crowding them, then drizzle or brush lightly with olive oil. The oil is what turns the coating golden.
- Bake and turn:
- Bake for 35–40 minutes, turning once halfway through, until the wings are golden, crisp, and the thickest part reaches 75°C (165°F) internally. Trust the timing but always check.
- Finish and serve:
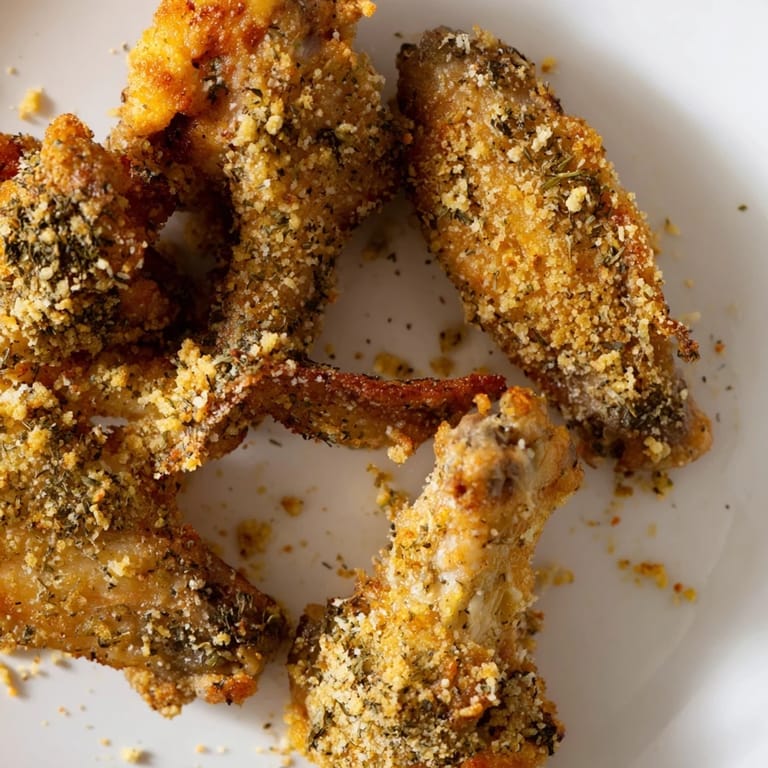
- Serve hot, with ranch or marinara sauce if you like, though they're honestly perfect on their own.
 Save to Pinterest
 These wings have become my go-to dish when I want to impress someone without spending hours in the kitchen. There's something about food that's both impressive and effortless that makes people want to come back.
The Secret to Crispy Coating
The combination of Parmesan and breadcrumbs creates a crust that stays crisp even as the wing cools—it's not just texture, it's about how the fat in the cheese and oil interact as they bake. I once tried using only breadcrumbs and regretted it immediately; the Parmesan is doing serious work here, adding both flavor and that irresistible textural contrast.
Why Baking Instead of Frying
Fried wings are undeniably delicious, but baking these gives you crispy results with far less oil and zero splattering. Your stovetop stays clean, your house doesn't smell like deep fryer for days, and honestly, the finished product tastes just as indulgent while being lighter on your conscience and your digestion.
Timing and Temperature Tips
An instant-read thermometer is your best friend here—it removes the guesswork and ensures the wings are cooked through without drying out. I learned to check the thickest part of the drumette, not the thin edge, and that changed everything.
- If your oven runs cool, add 5 minutes to the baking time and check early.
- For extra crispiness, broil for 2–3 minutes at the end, but watch them closely because broilers are temperamental.
- Let wings rest for 2 minutes after pulling them from the oven—they'll firm up as they cool.
 Save to Pinterest
 These wings have taught me that the best dishes aren't the ones that demand your entire afternoon—they're the ones you actually make because they fit into real life. That's when food becomes something people reach for again and again.
Recipe FAQs
- → Can I make this dish gluten-free?
Yes, substitute regular breadcrumbs with gluten-free crumbs to maintain the coating without gluten.
- → How do I get extra crispy wings?
Broil the wings for 2–3 minutes after baking to add an extra crispy finish.
- → What herbs can be used in the coating?
Dried Italian herbs or oregano work well, but you can swap with your preferred spice blend.
- → What internal temperature ensures wings are fully cooked?
The safe internal temperature for chicken wings is 75°C (165°F) to ensure they are thoroughly cooked.
- → Can I serve these wings with dips?
Yes, they pair excellently with ranch, marinara, or blue cheese dips for added flavor.