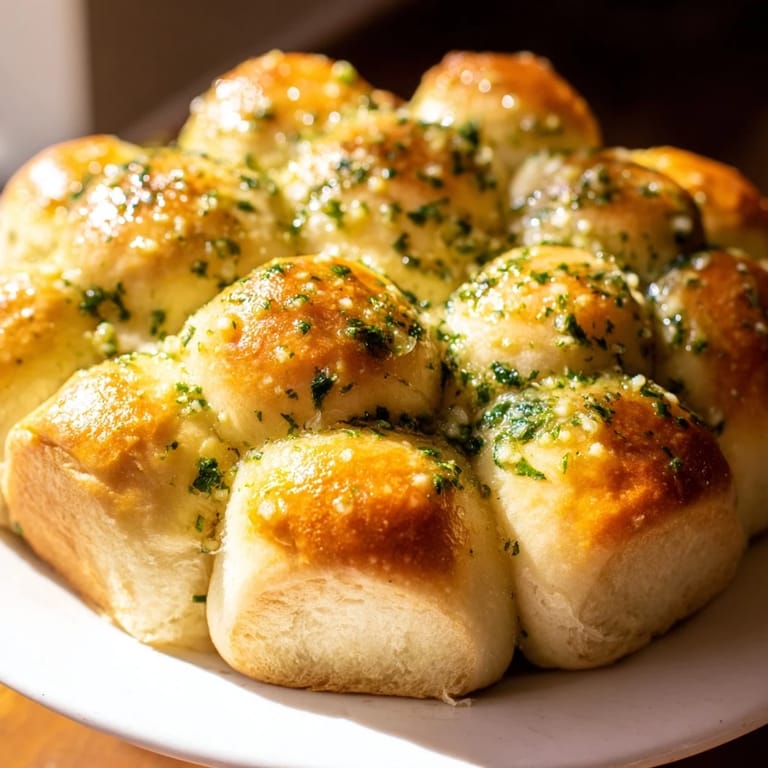
 Save to Pinterest
 My neighbor knocked on my kitchen door one evening, drawn by the smell of garlic butter wafting through our shared hallway. She'd stopped by unannounced, and I had nothing but bread dough rising on the counter and a stick of butter softening nearby. Twenty minutes later, we pulled apart golden, garlicky rolls fresh from the oven while steam curled between us. That spontaneous moment taught me that sometimes the simplest dishes create the most memorable gatherings.
I made this for my book club last month, and someone asked for the recipe before we'd even finished the first roll. She said her kids had actually put down their phones to eat bread together at the dinner table, which felt like a small miracle. That's when I realized this recipe isn't just about feeding people, it's about creating a moment where everyone wants to be present.
Ingredients
- All-purpose flour (3 cups): The foundation of soft rolls, and measuring by weight keeps them consistent every time you make them.
- Instant yeast (2¼ tsp): One packet does the trick, and keeping it in the freezer means it stays active longer than you'd expect.
- Sugar (1 tsp): Just enough to feed the yeast without making the rolls sweet.
- Salt (1 tsp for dough, ¼ tsp for butter): Salt strengthens the gluten and brings out the garlic flavor in the butter.
- Warm milk (1 cup at 110°F): Wrist temperature is your friend here, not a thermometer, though one helps until you get the feel right.
- Unsalted butter (2 tbsp melted plus 6 tbsp more for garlic mixture): Using unsalted lets you control the salt level, and melting it first makes it mix smoothly into the dough.
- Garlic (4 cloves, finely minced): Fresh minced garlic is non-negotiable, and the smaller you chop it, the more evenly it distributes through the butter.
- Fresh parsley (2 tbsp finely chopped): It brightens the flavor and makes the rolls look intentional, like you planned this.
- Ground black pepper (¼ tsp): A whisper of pepper keeps the garlic from feeling one-note.
- Parmesan cheese (2 tbsp grated, optional): It adds a salty, umami note that people taste but can't quite name.
Tired of Takeout? 🥡
Get 10 meals you can make faster than delivery arrives. Seriously.
One email. No spam. Unsubscribe anytime.
Instructions
- Mix your dry ingredients:
- In a large bowl, whisk together flour, instant yeast, sugar, and salt. This prevents the yeast from touching the salt directly, which can kill it before it has a chance to work.
- Bring it together:
- Pour in the warm milk and melted butter, then stir until everything is roughly combined. You'll have a shaggy, slightly sticky mass that doesn't look like much yet, but trust the process.
- Knead with intention:
- On a lightly floured surface, knead for 7 to 8 minutes by hand, or use a stand mixer with the dough hook for 5 minutes. Your dough should feel smooth and elastic, springing back slightly when you poke it.
- Let it rise:
- Place the dough in a greased bowl, cover it loosely with a towel or plastic wrap, and let it sit in a warm spot for about an hour. You'll know it's ready when it's roughly doubled in size and jiggles slightly when you move the bowl.
- Prepare your garlic butter ahead:
- While the dough rises, combine the melted butter, minced garlic, fresh parsley, salt, and pepper in a small bowl. The garlic will soften slightly as it sits in the warm butter, which is exactly what you want.
- Shape into balls:
- Once risen, punch down the dough gently and divide it into 12 roughly equal pieces. Rolling each piece between your palms into a smooth ball takes about a minute per roll and ensures they cook evenly.
- Coat generously:
- Dip each ball into the garlic butter, making sure it gets a full coat all over, then place it seam-side up in your greased pan. Once all 12 are nestled together, drizzle any remaining garlic butter over the top, letting it pool slightly in the cracks.
- Second rise:
- Cover the pan loosely with plastic wrap and let the rolls puff up for 20 to 30 minutes. They won't double in size like the first rise, but they'll look noticeably fuller and softer.
- Bake until golden:
- Preheat your oven to 350°F while the rolls do their final rise. If you're using Parmesan, sprinkle it over the top just before baking, then bake for 22 to 25 minutes until the rolls are deep golden brown on top and cooked through at the center.
- Cool briefly before pulling:
- Let them rest for 5 minutes, which firms up the outsides just enough to handle without burning your fingers. Serve them warm in the pan, and watch everyone pull them apart and eat with their hands.
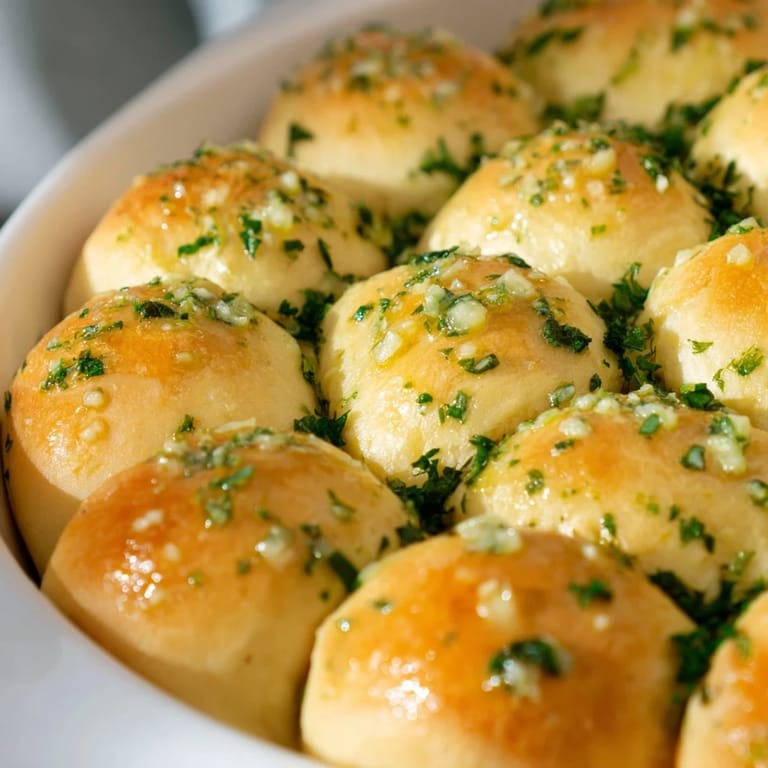 Save to Pinterest
 My son asked if he could bring these to a potluck at school, and the teacher texted me a photo of an empty pan with a note that said, 'These disappeared in under three minutes.' That's when I understood that sometimes the best recipes aren't the most complicated ones, they're just the ones that make people feel welcomed.
Variations That Work
The garlic butter base is flexible enough that you can pivot the entire flavor profile without changing the dough. I've tossed the balls in herb-infused butter with no garlic at all, made a version with everything bagel seasoning mixed into the butter, and even tried a spicy version by adding chili flakes and a tiny bit of cayenne. Each time, the rolls stayed soft and pull-apart tender because the technique stays the same.
Timing and Make-Ahead Options
The first rise is usually the longest part, so if you shape the rolls the night before, cover them tightly in plastic wrap, and refrigerate them, you can skip most of the second rise the next day and go straight to baking. The cold dough will need about 30 to 40 minutes to come to room temperature and puff slightly, but it's a real time-saver when you're hosting. Alternatively, you can prepare the garlic butter up to two days ahead and just keep it covered in the fridge, then warm it slightly before coating the balls.
Serving Suggestions and Storage
These rolls are best served warm and eaten the same day you bake them, though they stay soft for a few hours under a light kitchen towel. If you have leftovers, wrap them tightly and reheat gently in a low oven for about 10 minutes, which brings back the softness better than the microwave. They pair beautifully with tomato soup, pasta, or a simple salad, and they also work as an unexpected bread course at dinner.
- Leftover rolls make incredible garlic bread when you split them and toast them lightly under the broiler.
- If someone has a dairy allergy, you can substitute the milk with warm oat or almond milk and use olive oil instead of butter, though the flavor shifts slightly.
- Keep the pan in the warm place during rising, away from drafts, since cold spots slow down yeast activity.
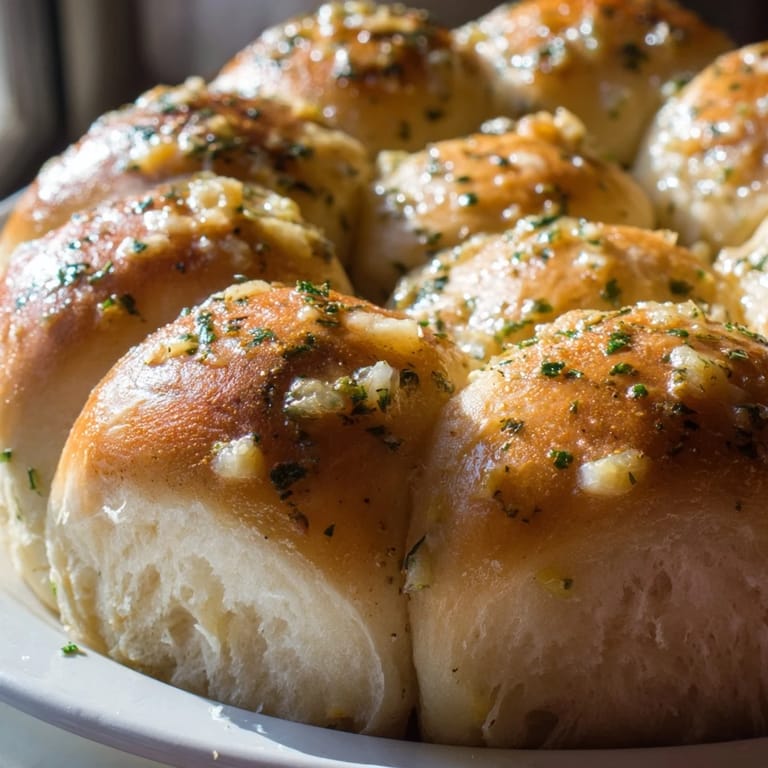 Save to Pinterest
 These rolls have become my favorite thing to bake when I want to feel generous without spending hours in the kitchen. There's something about pulling apart warm, garlicky bread with people you care about that feels like its own kind of language.
Recipe FAQs
- → Can I make the dough ahead of time?
Yes, you can prepare the dough up to 24 hours in advance. After the first rise, punch it down, cover tightly, and refrigerate. Let it come to room temperature before shaping and proceeding with the garlic butter coating.
- → How do I know when the dough has risen properly?
The dough should roughly double in size, usually taking 45 minutes to 1 hour in a warm environment. It should feel puffy and spring back slowly when poked with a finger. If it springs back immediately, it needs more time.
- → What's the best way to keep these warm for serving?
Serve the rolls warm, straight from the oven. If preparing ahead, wrap cooled rolls in foil and reheat at 300°F for 10-15 minutes. You can also keep them warm in a bread basket lined with a towel.
- → Can I freeze these rolls after baking?
Absolutely. Cool the rolls completely, wrap them tightly in plastic wrap and foil, and freeze for up to 3 months. Thaw overnight in the refrigerator, then reheat wrapped in foil at 325°F for 15-20 minutes.
- → Why are my rolls not rising properly?
Check that your milk is warm but not too hot (around 110°F kills yeast). Ensure yeast is fresh and stored properly. The environment should be warm, around 75-80°F. Cold kitchens require longer rising times.
- → Can I use dried herbs instead of fresh parsley?
Yes, substitute 2 tablespoons fresh parsley with 2 teaspoons dried parsley or dried Italian seasoning. Dried herbs are more concentrated, so use about one-third the amount of fresh herbs.